
Shipping and product labels play an important role in keeping orders organized and products easy to identify. A properly printed label can provide essential information such as an address, tracking number, product name, SKU, or barcode in a clear format.
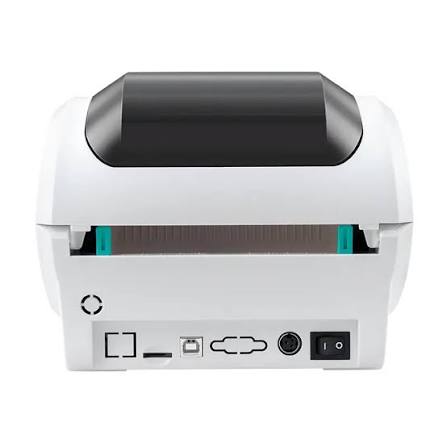
An Xprinter label printer can produce these labels when you pair the printer with compatible media and suitable labeling software. The setup depends on the model, but the basic process involves preparing the label design, loading the media, configuring the printer, and checking a test print before producing a full batch.
What You Need Before Printing
Before starting, gather the materials and information required for the job.
You will generally need:
- A compatible label printer
- Suitable adhesive label media
- A computer or compatible device
- Printer drivers or supported software
- Shipping or product information
- A stable connection between the printer and device
Check the printer specifications before purchasing labels. Size, material, thickness, and printing method all affect compatibility.
Set Up the Printer
Place the printer on a stable surface where you have enough room to load and replace label rolls.
Connect the printer to power and then connect it to your computer or another supported device. Depending on the model, you may use USB, Ethernet, Wi-Fi, or Bluetooth.
Install the appropriate driver or software if your device does not recognize the printer automatically.
Load the Labels Correctly
Open the printer and place the label roll in the media holder. Feed the labels through the intended path and make sure they remain straight.
The label surface needs to face the print head correctly. An incorrectly loaded roll can result in crooked printing, skipped labels, or feeding problems.
Close the printer securely after loading the media.
Prepare a Shipping Label
Shipping labels normally contain information such as:
- Sender and recipient details
- Shipping address
- Tracking number
- Barcode
- Order or reference number
- Service information
Your shipping platform or carrier may generate the label automatically. Download or send the label to your printing software in the format required by your setup.
Before printing a large batch, check the dimensions of the shipping label against the physical media loaded in the printer.
Configure the Shipping Label Size
Open the printer settings and select the correct label dimensions.
For example, a common shipping label format may require a wider label than a small product sticker. Selecting the wrong size can cause information to shift, become cut off, or print across multiple labels.
Also check the print orientation and margins. The settings in your shipping software and printer driver should match.
Print a Shipping Label
Send a single label to the printer as a test. Examine the address and barcode before printing the remaining orders.
Make sure the entire address appears within the printable area. The barcode should also look sharp and complete because scanning problems can create delays during shipping.
Once the test looks correct, print the remaining labels.
Create Product Labels
Product labels require a slightly different approach because the information depends on the item.
A product label might include:
- Product name
- SKU
- Price
- Barcode
- Model number
- Size or variation
- Batch information
Keep the design simple enough to remain readable at the chosen label size. Avoid adding unnecessary information that makes the label crowded.
Choose the Right Product Label Size
Measure the available space on the product or packaging before selecting your labels.
Small products may need compact labels with only a product name and barcode. Larger packaging gives you more room for detailed information.
The printer must support the dimensions of the media, so compare the label specifications with the printer’s supported range before ordering rolls.
Print Barcodes Clearly
Barcodes need accurate printing to scan reliably.
Choose a suitable size and leave enough clear space around the barcode. Avoid stretching the barcode disproportionately when changing the label layout.
Print a test label and scan it with the equipment you normally use. A barcode that looks clear to the eye should still pass an actual scanning test.
Check the Label Material
Shipping and product labels may face different conditions.
Standard paper labels can work well for many indoor applications. Products exposed to moisture, heat, sunlight, or frequent handling may need a more durable material.
The material should also work with the printer’s printing technology. Direct thermal and thermal transfer systems use different approaches, so check compatibility before purchasing media.
Print Labels in Batches
Once the layout and settings work correctly, batch printing can save time.
Before sending a large print job, confirm that the correct label roll remains loaded and that the software has the right dimensions selected.
It can also help to print a small batch first. This gives you a chance to catch alignment or formatting problems before using a large portion of the label roll.
Also, explore How to Compare Receipt Printer Suppliers for Better Value
Troubleshoot Common Printing Problems
Several issues can appear when printing shipping or product labels.
Labels Print in the Wrong Position
Check the label dimensions and run the appropriate calibration procedure. Also confirm that the software and printer driver use matching settings.
Labels Come Out Blank
Check that the media is loaded correctly and that it matches the printer’s printing technology. Thermal transfer models may also require a correctly installed ribbon.
Barcodes Do Not Scan
Inspect the barcode size, contrast, print quality, and placement. Try printing at a suitable speed and resolution for the label design.
Labels Feed Incorrectly
Check the roll position and media path. Remove damaged labels and confirm that the printer supports the label dimensions and material.
Keep Shipping and Product Labels Consistent
A consistent label format makes order processing easier. Use the same basic placement for addresses, product information, SKUs, and barcodes across similar labels.
Templates can also reduce repeated design work. Once you have a tested shipping or product label template, you can update the variable information without rebuilding the layout each time.
Final Thoughts
Using a label printer for shipping and product labels involves more than simply pressing the print button. You need compatible media, accurate label dimensions, suitable software, and properly configured printer settings.
Start with a single test label, verify the alignment and barcode quality, and then move to batch printing. This simple approach can help prevent wasted labels and keep shipping and product identification tasks organized.